Monday, April 24, 2017

Poultice Stain Remover for Marble

Removing Stains From Marble


Marble is a common material for kitchen countertops and bathroom surfaces. It is a material of choice for many homes since it is affordable while giving your home an expensive and elegant look.

 However, just like other sedimentary rocks, marble tends to be soft and porous, thus, tends to stain easily. If you have stains on your marble floor or countertop, don’t panic. 

These stains are easy to remove using a homemade poultice.
 The materials used to form the dressing vary depending on the stain.

Marble Stain Removal

Identifying the nature of the stain on the marble surface is the key to successful removal. If unsure about the stain, you can try to detect it by asking yourself the following questions.

 Where is it located? Is it near a food service area? Is it near cosmetics? 
What is the pattern? Most surface stains on marble can be removed using appropriate cleaning products. The following are some of the stains you will encounter on marble and how to deal with them.

Oil-based Stains

These include cooking oil, milk, tar, cosmetics, and grease. Oil-based stains usually darken the marble. Most must be chemically dissolved to ensure the source of the stain is successfully rinsed. 

Clean the affected surface gently using a soft, liquid cleanser mixed with bleach. You can also use a household detergent, mineral spirits, acetone, or ammonia.

Organic Stains

Organic stains include tobacco, coffee, fruit juices, bark, bird droppings, urine, leaves, paper, tea, and coffee. These might leave a pinkish-brown color on the surface. Most of them disappear after removing the source of the stain. 

On outdoor marble surfaces, average rain and sun action will bleach out the colors once the stain is removed. If the stains are indoors, clean the surface with 12% hydrogen peroxide mixed with a few drops of ammonia.

Water Spots and Rings

Water spots and rings occur due to the surface accumulation of hard water. They are the easiest to clean. Furthermore, unlike other marble stains, they don’t penetrate beyond the surface. You must buff them with dry steel wool and then wipe the surface.


Metal Stains

These are left behind by rust, iron, copper, and bronze. Rust or iron stains have a brown to orange color. 

They usually assume the shape of staining material like bolts, screws, nails, flower pots, metal furniture, and cans. 
Bronze and copper stains appear as muddy-brown or green. They occur from a motion on embedded or nearby copper, bronze, or brass items. 

Metal stains must be removed using a poultice. Rusty and deep-seated stains are pretty challenging to remove. In fact, they might leave a permanent color on the stone.

Etch Marks

Etch marks result from acid stains remaining on the surface for an extended period. Some materials tend to etch the finish without leaving a color. However, others will both stain and etch. After removal of the stain, wet the stone’s surface using clear water and then sprinkle some marble polishing powder.

Preparing a Poultice


A poultice stain remover for marble is a chemical or liquid cleaner combined with a white absorbent material in the form of a paste. The poultice is then spread over the affected area to form a thickness of approximately ¼ inch using a wood or plastic spatula. This poultice is covered with plastic and left on the surface for 24 to 48 hours to work.


 The chemical or liquid cleaner will draw the stain out, which is soaked by the absorbent material. For thorough removal of a stain, poultice procedures might have to be repeated. 

However, some stains may never be eradicated, regardless of how often you repeat the process.

Poultice Materials

Some materials used to form a poultice include whiting, fuller’s earth, kaolin, powdered chalk, white molding plaster, and diatomaceous earth. 

In most situations, an average of a pound of the prepared poultice material can cover one square foot. Never use iron-type clays like Fuller’s earth or Whiting when dealing with acid chemicals. 

This reaction usually cancels out the ability of the poultice. You can also prepare a poultice using white paper towels, white cotton balls, or gauze pads.

Bottom Line
Stain removal on marble surfaces is easy as long as you have the appropriate poultice. However, some stains tend to be stubborn, especially iron stains. 

If you face any challenges when removing any form of stain, it is always advisable to seek the help of professionals. They will get the job done perfectly within a short time.

Thursday, April 6, 2017

Driveway Pavers Permeable Pavers for Driveways

Stone Driveway Paving

Most people overlook the driveway as an architectural part of the house. However, it is primarily the first part of your home that people encounter. 

A driveway should create harmony between the surrounding landscape and the style of your house. Therefore, whether it is rustic and rugged or smooth and sleek, the selected material should ensure that the driveway fits with the aesthetics of your property.

In addition, the chosen driveway pavers will also affect the driveway's durability, cost, and maintenance. 
With so many materials on the market, choosing the right paver for your driveway can be overwhelming. However, we have narrowed down some of the most common types to make your work easier.

Interlocking Pavers

Interlocking pavers are mainly made of concrete or cement. They are shaped so that they can interlock with similar pavers. This design also makes their installation easy, without the need for mortar. 

Once they have been installed, they resemble cobblestone pathways.
You should ensure the pavers are laid over a solid base during installation. 
This prevents them from shifting as well as cracks.
driveway interlocking pavers

Since these pavers are made of concrete or cement, they are primarily gray. 

However, that should not limit your imagination. They can also be designed using various color combinations and patterns to create personalized and special effects.

Since they are porous, they are vulnerable to staining, especially after some years. 
Pressure washing can remove tire marks, oils, and other stains when this happens.

 One of their most significant advantages is durability. They can withstand the elements and traffic. They can also withstand freeze-thaw conditions.

Tar and Chip Driveways


If you want to redo your driveway and are looking for a durable and cost-friendly solution, you should consider tar and chip. These driveways are an affordable alternative to other materials like asphalt.

 It has a loose stone appearance, which provides good traction. However, unlike asphalt driveways, which are usually slick and smooth, tar and chip driveways tend to be rough.

Besides providing good traction, tar and chip driveways also have other advantages. For example, small oil leaks are usually covered by gravel and won't require expensive maintenance practices.

In addition, they are cheaper than asphalt driveways and are more durable.
Although it appears like a traditional gravel driveway, it is more robust, durable, and easier to manage. In addition, the installation process is quite simple. 

A gravel base is spread first, which is followed by hot tar. Next, stones are laid over the tar, and the surface is pressed using roller equipment.

Exposed Aggregate


Exposed aggregate is one of the most common driveway pavers and one of the hottest trends. It is available in various colors, shades, and sizes. It also creates an attractive and unique driveway, enhancing and adding value to your home.

Exposed aggregate allows you to create a non-slip sealed surface lasting more than ten years with little or no maintenance. The exposed aggregate surface is made through special concrete mixes. The special concrete mixes combine unique aggregates, which are seen exposed on the surface.

The surface finish reveals textured smooth pebbles and stones, which form part of the concrete surface. This differs from a smooth concrete finish, which usually displays concrete particles. In addition, exposed aggregate pavers help to eliminate the grey surface finish, which is very common in poured concrete finishes.

Asphalt Driveways


If you are looking for a cost-effective alternative to concrete driveways, you should install asphalt ones. They are more flexible and cheaper than concrete. In addition, their appearance can be customized to meet your preferred look. Asphalt is mainly made of sand, rock, and asphalt cement. Asphalt cement is a petroleum product.

The material is mainly black. This has led most people to believe there are no other colors or patterns available. When most people think of an asphalt driveway, what comes to mind is a black and flat surface. However, this is not the case. Similar to concrete, asphalt stamping can create beautiful and intricate patterns.
 This aesthetic touch can be enhanced further by mixing polymer dyes which give the asphalt surface different colors, hues, or tints.

Similar to concrete, asphalt should be laid on a solid foundation. 
A poorly laid or weak foundation can compromise its strength and durability. 
Due to their petroleum base, asphalt pavers are flexible, enabling them to withstand water's expansion and contraction.

 Due to their black color, they tend to retain quite a lot of heat, which can be problematic during summer but advantageous during the cold months. They are cost-effective, cheap to install, and require less maintenance. However, they tend to crack more than concrete.

Rubber Driveways


The whole idea of rubber driveways appears unimaginable. However, they are quickly gaining popularity among environmentally conscious property owners. 

Millions of worn-out tires are discarded every year. They end up filling landfills in different parts of the world. 
Due to the chemical composition of rubber, it takes many years to break down. 
Furthermore, trashed tires form a breeding ground for rats and mosquitoes.

They also leak toxins into water systems while generating methane gas, which contributes to global warming. 

Therefore, choosing a rubber driveway is an excellent way to prevent tires from filling our landfills and putting them to good use.
 In addition, rubber driveways are more affordable than those made of natural or traditional materials.

Rubber Driveways


When it comes to rubber driveways, the aesthetic choices are only limited by your imagination. Rubbers are available in different colors, such as black, bright blue, dusty red, dirt brown, turf green, and subtle grey. 

Moreover, you can have your rubber driveway as a cobbled or tile formation. This adds intrigue and texture to durable and heavy-duty material. 
Since tires don't crack, even when exposed to extreme elements, they require minimal maintenance.

Bottom Line 


When it comes to choosing your driveway pavers, the materials are endless. From rubber driveways to custom brick driveways, the choice is all yours. Each type comes with its own characteristics, advantages, and drawbacks.

Friday, March 31, 2017

Concrete Finishes-Concrete Finishing Techniques Los Angeles

Concrete  Finishes Types

Concrete is one of the most versatile construction materials. Due to this versatility, it is widely used as a flooring material in various residential, industrial, and commercial applications. Its strength lies on the inside, while its beauty is on the outside.
 This external appearance can be modified through various techniques and materials to achieve your desired surface finish. Here are some methods that can be applied to achieve the desired concrete finish.

Concrete Finishes Los Angeles

The most common form of concrete finish is a smooth surface. This is achieved using screeds and towels. Once the concrete has been poured on forms, the technicians use a screen to even out the concrete surface. Screeds are composed of long pieces of wood or metal, which are then pushed and pulled across the surface. This technique removes excess concrete while filling in gaps on the surface.

 Troweling or floating 


After cooling the concrete using a screed, the finishers use trowels to fine-level and smooth the surface. They can achieve this through mechanical or manual means. 
To do this manually, the concrete finishers use a hand trowel, a flat steel blade and an attached handle.

They then push and pull it across the surface of the concrete. Power trowels are also available, although they are mainly used on large industrial and commercial applications, where hand trowels would be too tedious. When it comes to power trowels, you can use the riding or walk-behind versions.

Concrete edging


Concrete edging is mainly done to provide beveled or rounded edges on the finished surface of the concrete. They are also done to form joints on the surface to reduce cracking.

 Concrete technicians use a specific edging tool to achieve this task. Edging also requires thorough practice before you can master the technique.


 Broom finish concrete


A broom finish is applied to make the surface slip-resistant. Once placement, leveling, and concrete troweling, broom finish follows. After creating a smooth surface, the concrete installer drags a broom across the concrete surface.

This creates small ridges, which enhance traction and grip, especially when the surface is. Surfaces that don’t have a broom finish are pretty slippery and dangerous, especially when liquids are present.

Concrete Texture


Besides broom finishing, numerous other means are available for achieving texture on the concrete surface. Some of the finishes are listed below.

 Exposed aggregate concrete


This finish is widespread on sidewalks, especially in old cities. It is formed when the top layer of concrete is washed away. When this happens, the edges of natural stone aggregates, mixed with concrete, are exposed.
The resulting surface is slip-resistant and attractive.

Apart from using everyday concrete materials, you can also add other materials into the mix.
The result is a unique look. 
Some materials that can be added to the mix include limestone, rose quartz, black or dark grey basalt, blue or red granite, sea shells, and colored glass.

When adding these materials, avoid anything that contains iron since it might stain the concrete. You should also seal the surface after curing it to protect it from wear and tear.

Salt finish

This finish is commonly applied on swimming pool decks. Rock salt is applied on top of wet concrete and washed away in a salt finish. This creates small pits on the finished surface. This application also reduces slipping on pool decks since they are often wet.

Concrete Coloring

Concrete coloring is a standard application in modern construction settings. Decorative concrete is usually applied to match the décor or architecture of the building. 

It can be achieved through post-cure staining or mix-added pigments. The two applications are discussed below.

 Pigment coloring


Pigment coloring is a simple process, usually achieved by adding pigments straight to the concrete mix before pouring. This allows enough time for mixing with the rest of the concrete. 

You can source pigments in dis-solvable bags or liquid form. The dyes are combined with the other ingredients before pouring in each case.

Pigment coloring gives you various color choices, from browns, tans, greens, grays, and blues. Once pigment coloring has been applied, keep the surface sealed throughout its lifetime to prevent water infiltration, which might lead to fading.

Concrete stain and Sealer

You don’t have to stick with gray, dull concrete surfaces. Those days are long gone. You can manipulate concrete’s color using various staining methods. 

Acid application is one of the most common methods for concrete staining.
Similar to the application of concrete pigments, you can only obtain relatively subtle or non-bright color tones.

Water-based, commonly known as acrylic staining, gives a broader range of colors. However, water-based staining is prone to fading.

With acrylic staining, you can even obtain black and white colors. However, it does not stick on the concrete for long, requiring re-touching. Stains can be applied to any concrete, regardless of age.

However, the colors tend to be more vibrant when the staining is applied immediately after placing the concrete. Stain application is followed by concrete sealing to protect the surface.

Polished Concrete Los Angeles


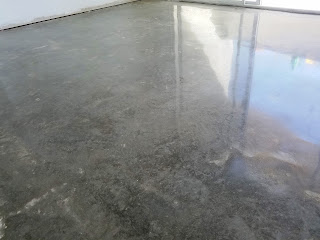
When concrete surfaces have cured completely, they can be enhanced with a polishing effect to achieve a glossy and clean look. Polished concrete surfaces are also easier to maintain. In addition, they are more slip-resistant as compared to non-polished concrete.

The process of concrete polishing is done using concrete grinders. These grinders are usually outfitted with diamond abrasives. 

The grade of the abrasive will determine the result. The surface is stripped of any existing treatment, such as coatings or sealers, during the polishing process.

 After that, all visible cracks are repaired. The polishing process then follows, using either a fine or coarse grade.
concrete polishing Los Angeles


During the process, chemical hardeners are also applied to provide a future shield against water infiltration. 

Finer abrasives are then applied until the preferred finish is achieved. 

The final step in the polishing process involves sealing to protect the surface from chemicals, oil, moisture, and staining.

Contact us JK Marble Maintenance 818 984-1195

Friday, March 24, 2017

Concrete Vapor Barrier Concrete Floor Moisture Sealer

Concrete Moisture Barrier

The porous nature of concrete means that water beneath the surface can seep through the concrete floor, leading to dampness. This can cause issues with mildew and mold, making your home uncomfortable and unhealthy to live in. If you have furniture or carpet on top of your concrete floor, they might be badly damaged.

Garages and basements, which are mainly made of concrete floors, are highly vulnerable to poor air circulation. This means that moisture has nowhere to go, after seeping through the floor. The good news is that placing a vapor barrier under the concrete slab can prevent this moisture from seeping through. This helps to prevent your concrete floors, as well as your valuables.

Vapor Barrier for Concrete


A vapor barrier for concrete is a form of concrete sealer. It prevents water or moisture from seeping through the concrete floor. High moisture vapor emission rates might be due to clogged or blocked drain pipes, broken water pipe, poor exterior landscaping, and high water table, just to name a few. There are two main types of concrete sealers.

 These are regular concrete sealer, and moisture blocking sealer. However, there are slight differences between the two sealers.
A moisture vapor blocker penetrates deeply into the capillary structure of hardened concretes. This means that it fills up all the pores, thus solidifying the inner structure of the concrete while blocking any access the moisture vapor would use, to seep through to the surface. If it is properly installed before the concrete floor is poured, then you would not have to block moisture reaching the surface of the concrete.

In short, the moisture would have been eliminated from the source, which is the sub-base. Furthermore, this would cut costs that are associated with repairing or sealing concrete floors, after moisture starts seeping through. When vapor barrier is not used at the time of pouring, the most appropriate solution would be waterproofing the concrete from the surface. This procedure takes advantage of the porous nature of concrete.

Moisture vapor barriers work by penetrating deep into the concrete substrate and then forming a hydrophilic and hygroscopic crystalline material, which blocks the concrete pores permanently. This way, no amount of water vapor or moisture can seep from under the concrete to the surface. This crystallization procedure gradually fills in and blocks the capillaries even during constant hydrostatic pressure.
Within a certain period, all the pores in concrete are completely blocked, thus eliminating any chance of water vapor seeping through. As you can see, the two methods serve the same purpose but mainly differ in application.


Benefits of Preventing Moisture Transmission in Concrete Floors 


Once moisture vapor seeps through to the concrete’s surface, it can lead to numerous problems. The problems are more compounded especially in floor materials that don’t allow concrete to breathe. Flooring materials such as linoleum, epoxy, wood, and glued on laminate, can seal the surface. This leads to a buildup of moisture pressure in the concrete. When the pressure rises to a certain level, usually over 3 lbs per 1000 square feet within a period of 24 hours, the flooring materials can peel, lift, blister, and even buckle.

The extent of the damage depends on the amount of water vapor trying to escape. If you are planning to apply a certain flooring material on your concrete floor, then you should first test the moisture level in the concrete, even if the surface appears dry.

concrete moisture barrier


As previously highlighted, concrete is a porous material and the moisture might be evaporating as soon as it hits the surface, making it unnoticeable.
You can conduct a simple calcium chloride test. This procedure helps to determine how fast moisture vapor escapes from the surface.

Majority of the flooring manufacturers recommend that transmission of moisture vapor from a concrete floor should be below a specific rate before installation of flooring materials.
Materials for Blocking Moisture Vapor
There are numerous materials on the market, which can be used as vapor barriers for concrete. The material chosen depends on the flooring materials, as well as personal preferences. However, one of the best concrete floor moisture sealers is a compound known as RadonSeal. It is a deep concrete penetrating sealer, which achieves the following.

- Waterproofs strengthens and mitigates concrete
- Blocks moisture vapor from seeping through the surface
- Penetrates the concrete substrate and permanently seals outdoor and indoor poured concrete as well as concrete blocks from water seepage
- Eliminates or reduces radon gas, which is unhealthy
- Hardens and densifies concrete, thus blocking the pores and minimizing instances of water vapor from reaching the surface
- Stops hydrostatic pressure
- Prevents cracking, spalling and dusting.

RadonSealer can also be used for sealing basement floors, basement walls, crawlspaces, slab-on-grade foundations, warehouse floors, driveways and parking areas. This concrete floor moisture sealer is water-based. Therefore, it doesn’t leave behind a film on the concrete’s surface. Furthermore, it is paintable, slip-resistant and has zero VOCs. It also has a money-back lifetime guarantee, which is a mark of a quality product.


Additional Benefits of Concrete Floor Moisture Sealing 


Apart from the obvious fact of preventing moisture from seeping through to the surface, they also seal voids and capillaries. This helps to strengthen the integrity of the concrete. Furthermore, a concrete floor moisture sealer increases adhesion of paints and coatings, increases surface abrasion resistance, increases the strength of concrete, adds density, improves chemical and acid resistance, improves thermal resistance and prevents internal water migration, just to name a few.

Final Word
If you are planning to apply a coating or a decorative element to your concrete floor, then you should first ask your contractor, to test the floor for moisture vapor transmission. It is an easy and inexpensive process, which will take only a few minutes to complete. It will save you from moisture issues in future. If the moisture reading is higher than the coating’s rating, then you should use a vapor barrier for concrete or a moisture vapor blocker. After that, test the concrete again using the same procedure. You should only apply the coating until the results prove that moisture content is below the coating’s rating. Protection is always better than cure. 

Travertine Restoration: A Comprehensive Guide to Restoring the Natural Beauty of Your Floors

Travertine Restoration  If you have travertine floors in your home or office, you know how beautiful they can be. However, wear and tear ove...